
א שסתום פילוט הוא רכיב בקרת דיוק ששולט בהתנהגות של שסתומים תהליכיים גדולים במערכות תעשייתיות. כאשר שסתום הניהול מתחיל לתקול, השלכותיו עלולות להתפשט לאורך כל צינור או מערכת ניהול הלחץ, ולגרום לעליות וירידות לא בטוחות בלחץ, לקשיי יעילות בתהליך ולעצירת פעילות בלתי מתוכננת יקרה. הבנת הדרך לזיהוי, אבחון ופתרון קשיים בתפקוד שסתום הניהול היא כישרון חיוני למתחזקים, טכנאי תהליכים ומנהלי מפעלים העוסקים בתחום הנפט והגז, עיבוד כימי, ייצור חשמל ותעשייה קשורה.
אבחון תקלות בשסתום ניסיוני דורש יותר מאשר בדיקה ויזואלית. זה מחייב גישה שיטתית שכוללת את דינמיקת הנוזלים, הסחיפה המכנית, זיהום, סטיית קליברציה ותנאי ההתקנה. מאמר זה מתאר את קשיי הפעולה הנפוצים ביותר של שסתומים ניסיוניים שנתקלים בהם בסביבות תעשייתיות, מסביר את הגורמים העמוקים לכל מצב כשל, ומספק הנחיות מעשיות לשחזור פעילות אמינה. בין אם אתם מתמודדים עם שסתום ניסיוני שלא נפתח, מתרגז תחת עומס או סוטה מהערך המוגדר שלו – מסגרת האבחון המוצגת כאן תסייע לכם לפתור את התקלה באופן יעיל ולמנוע את חזרתה.
הבנת דרך בה שסתום ניסיוני מבקר את התנהגות המערכת
התפקיד של השסתום הניסיוני בניהול הלחץ
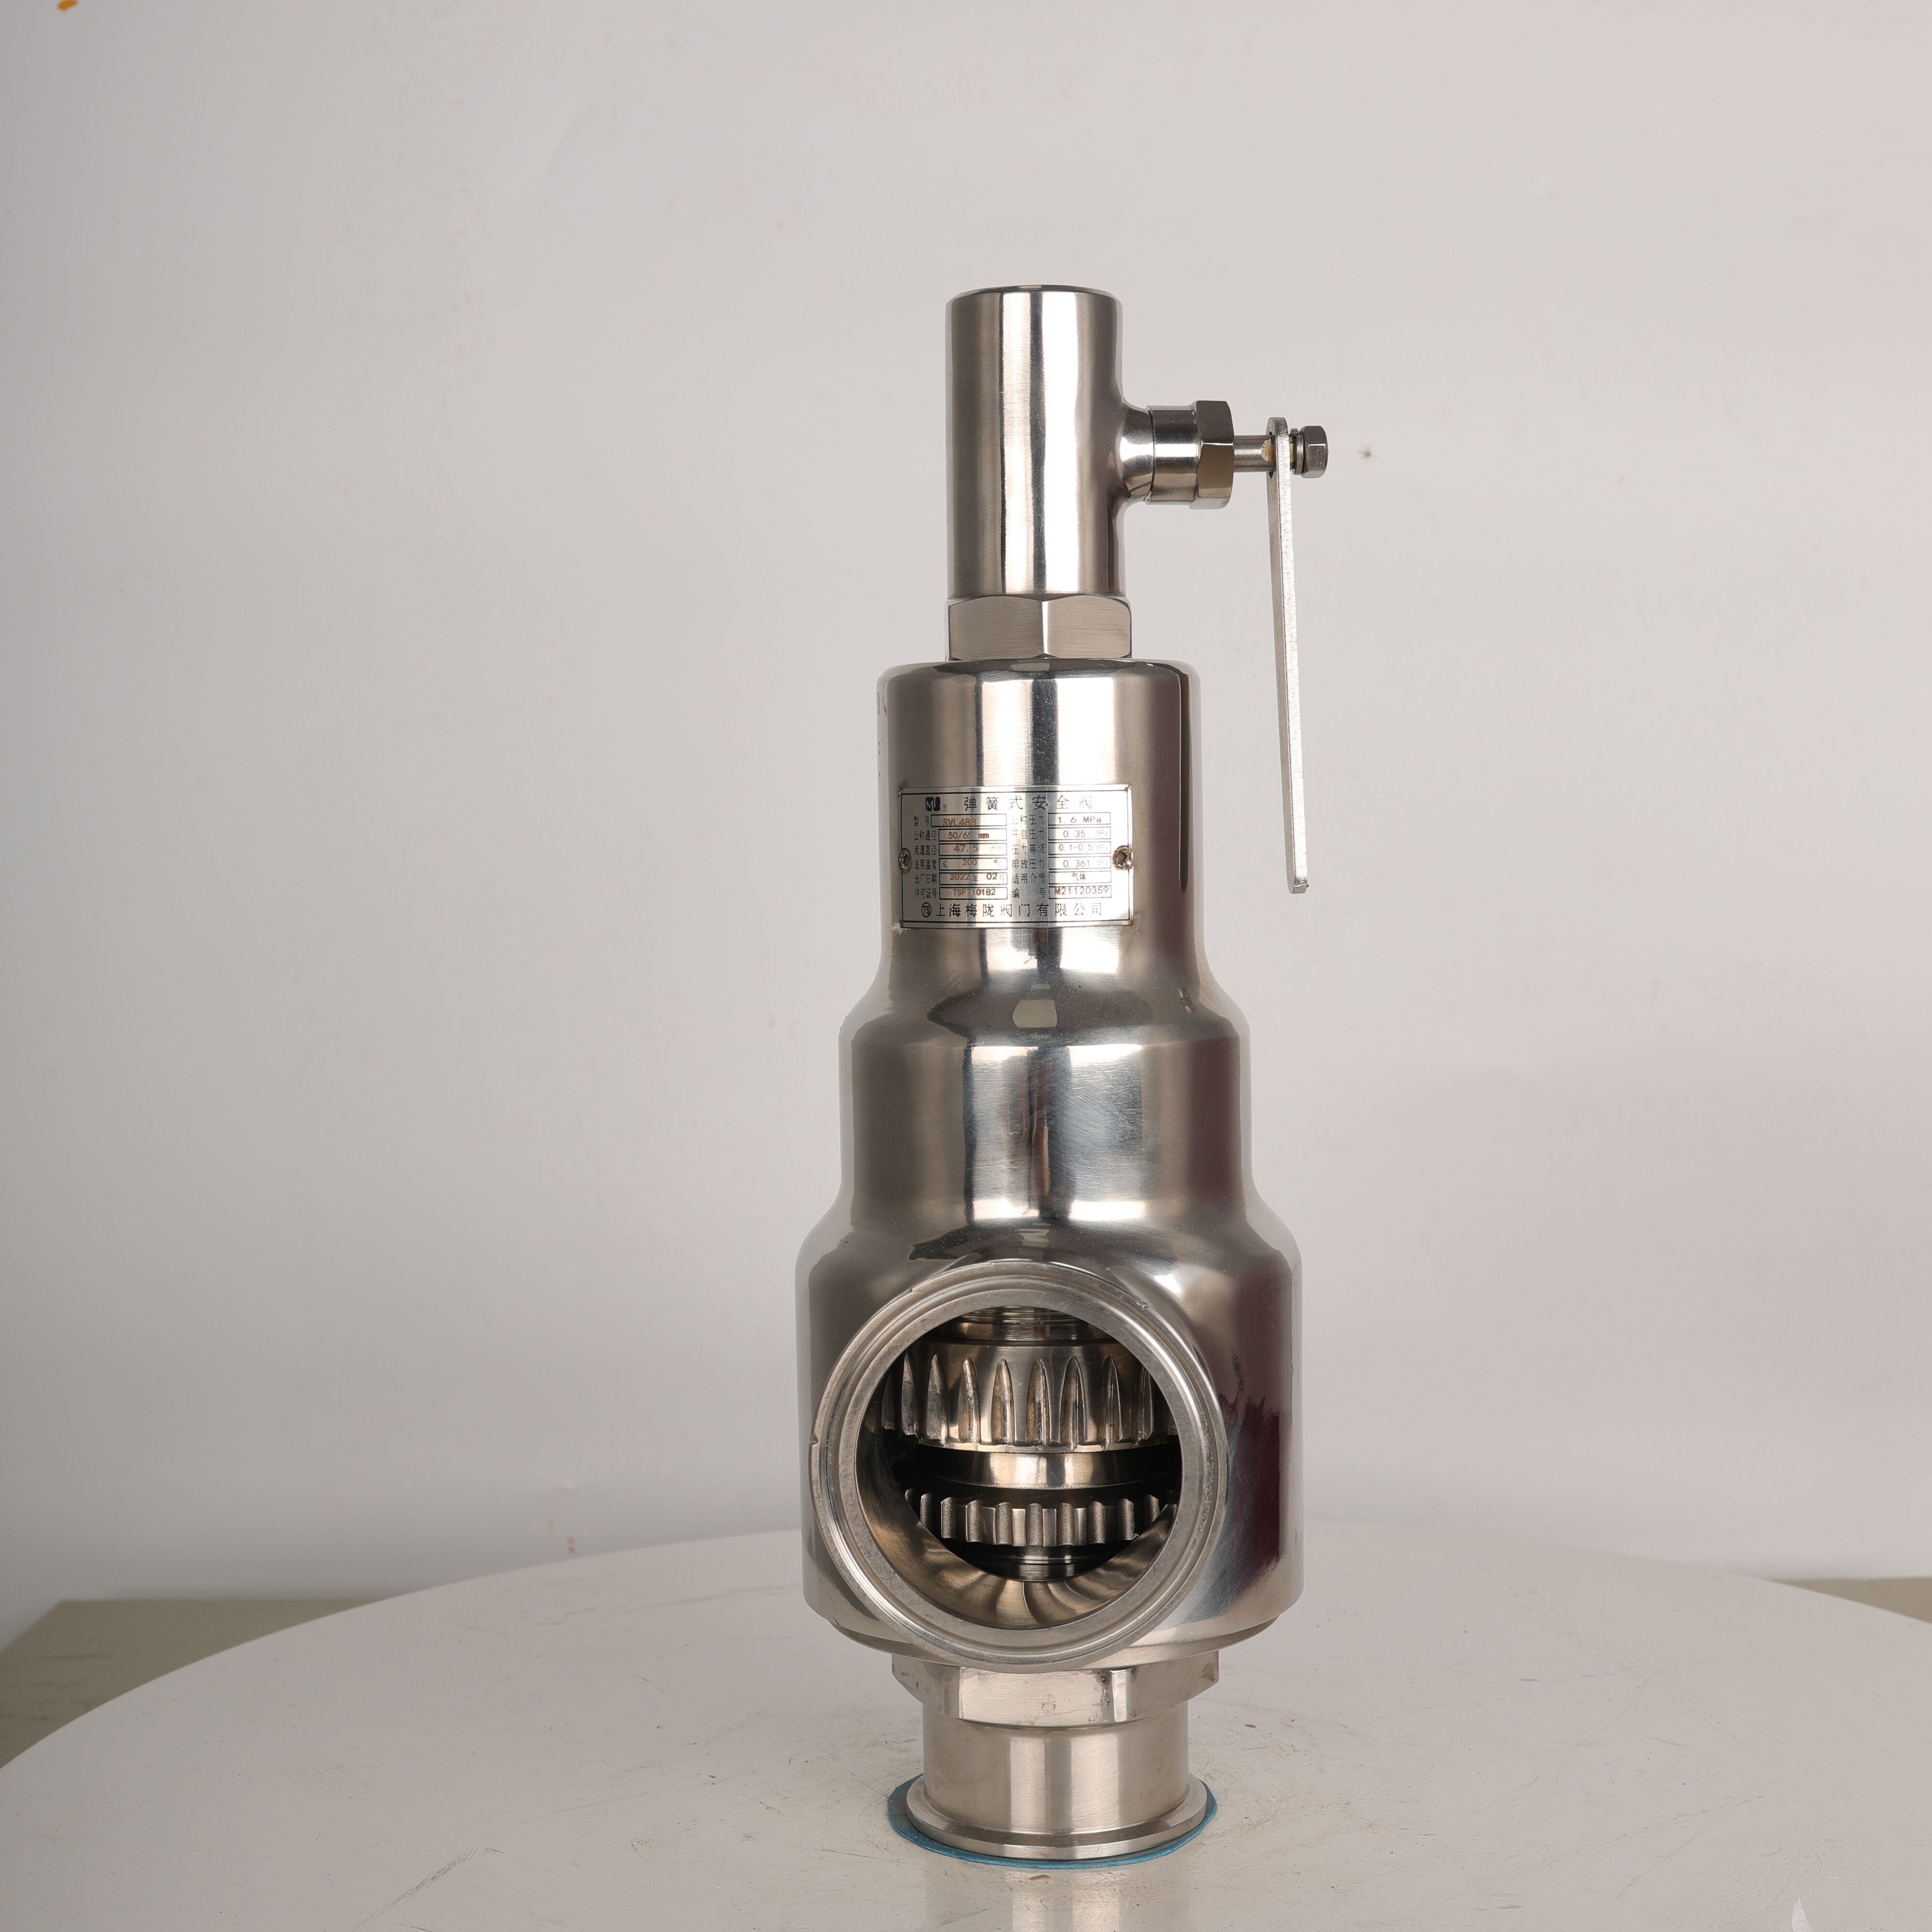
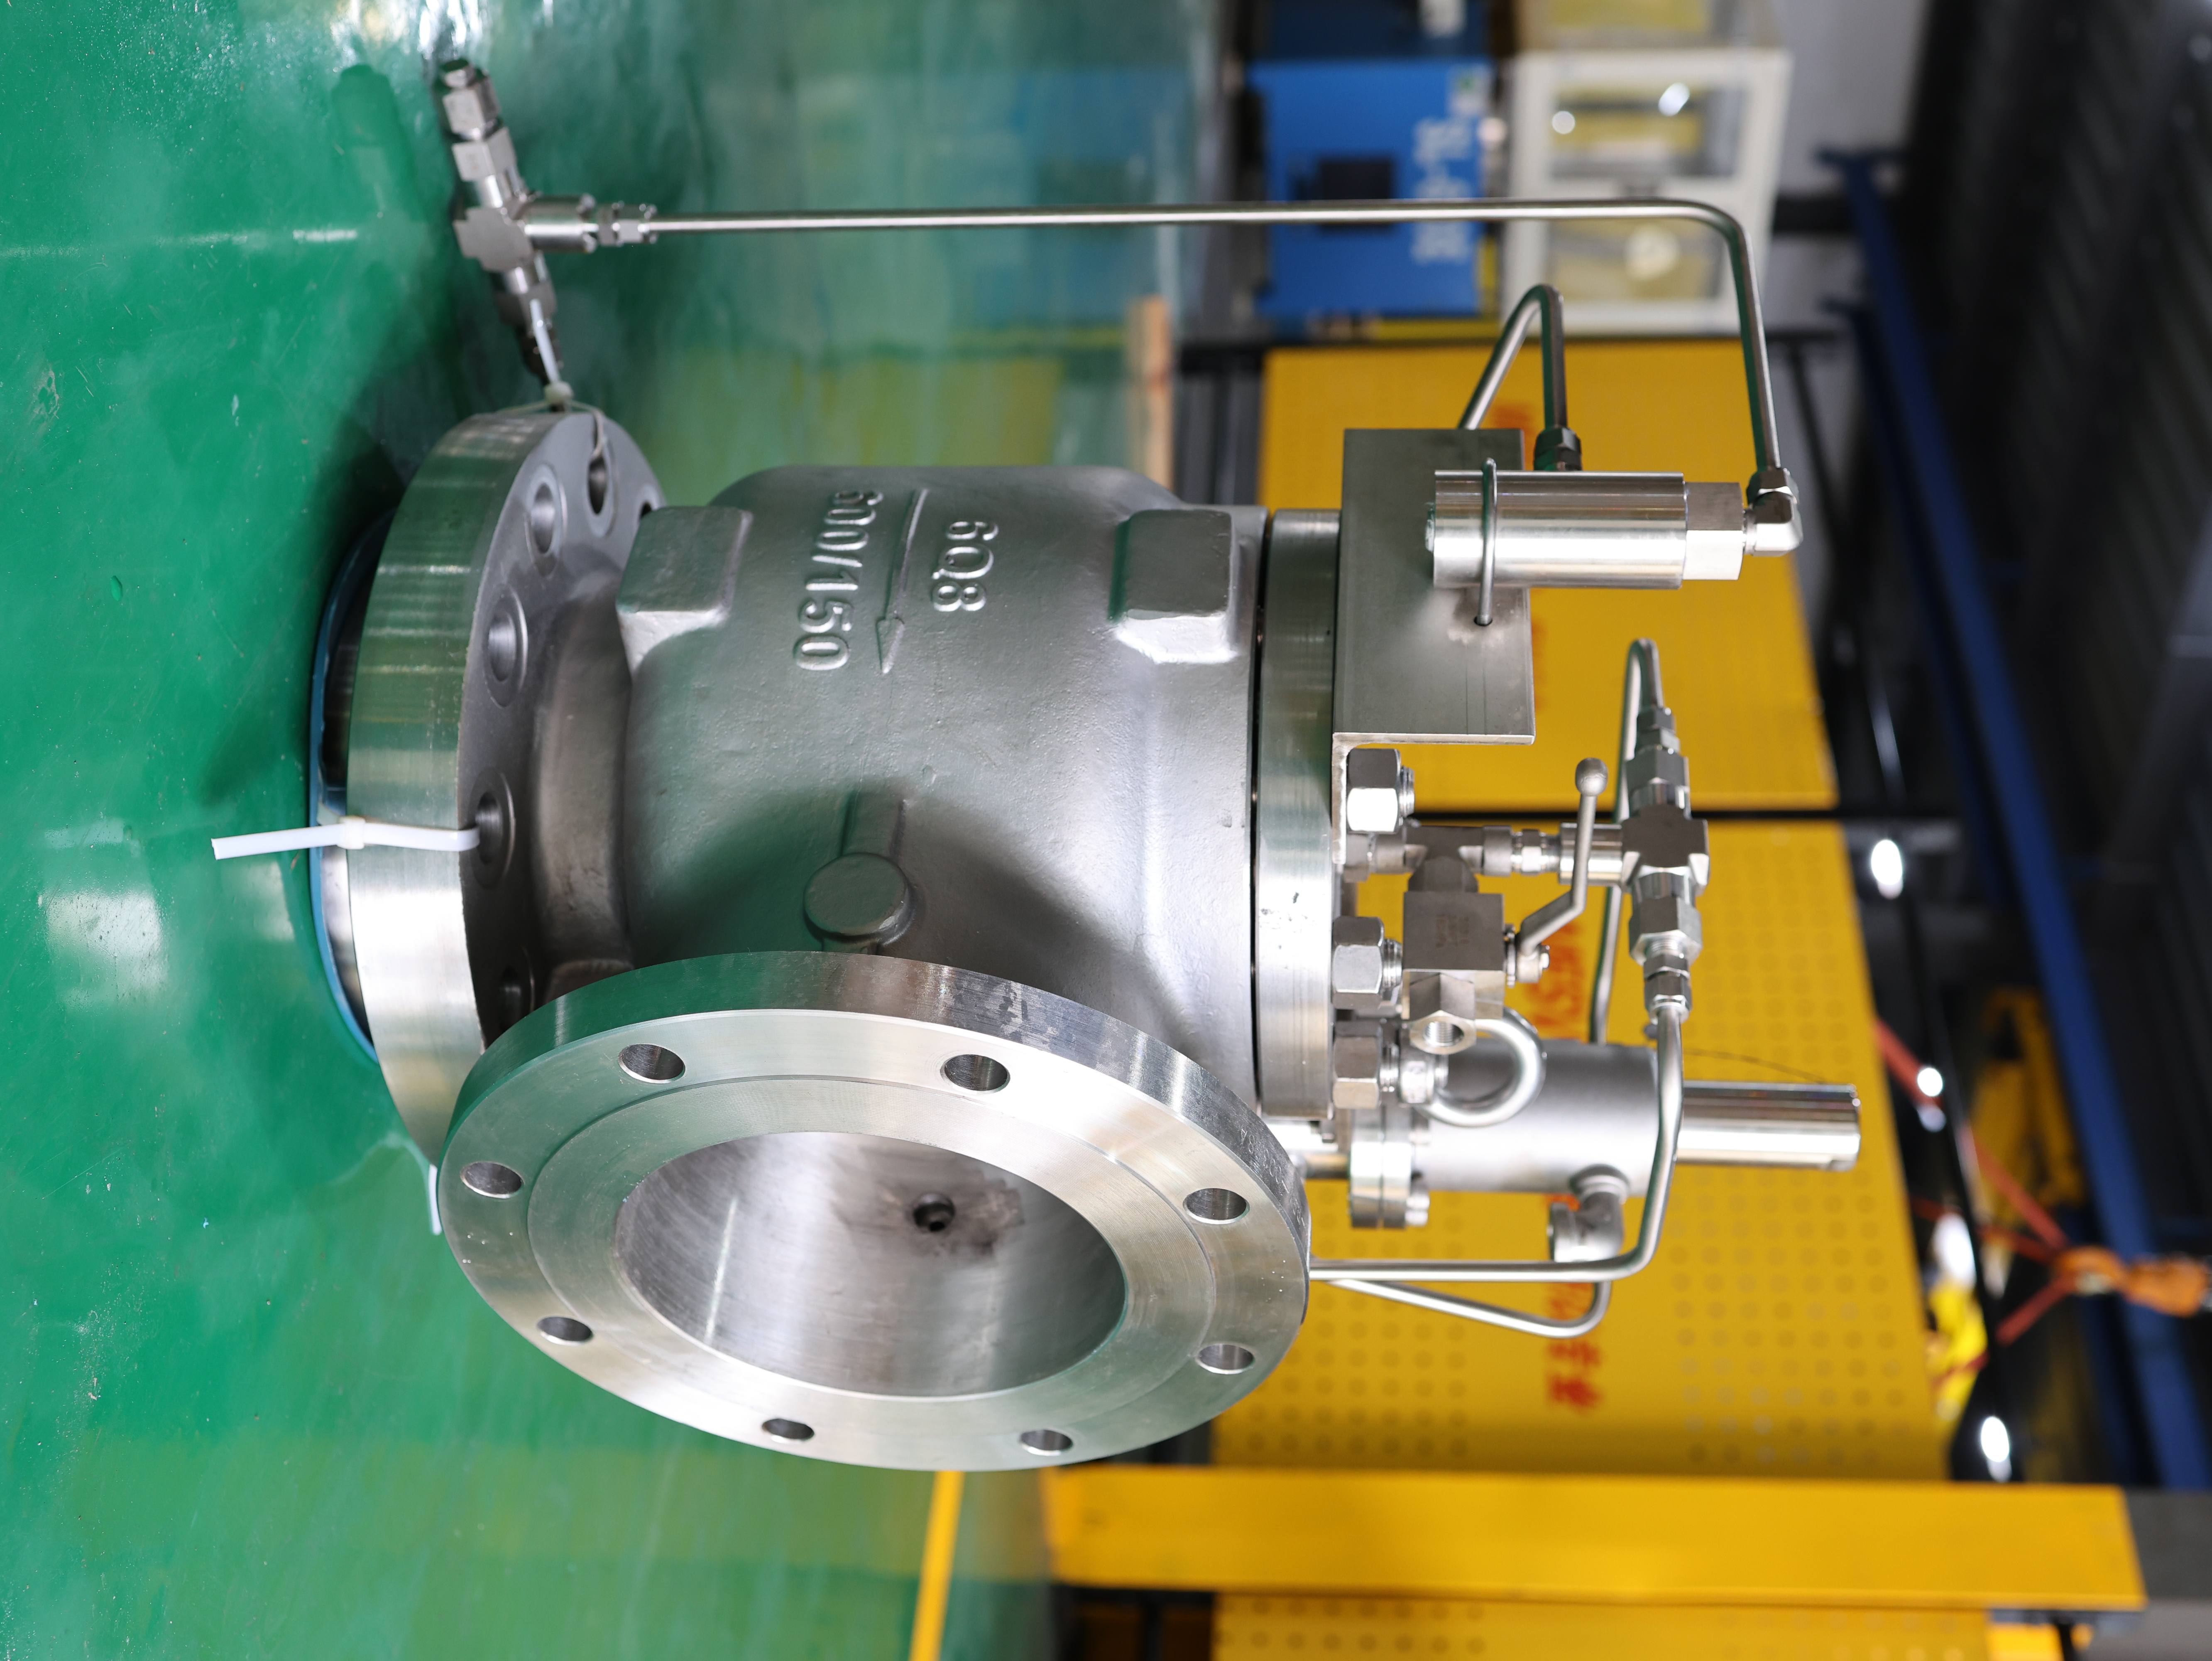
שסתום ניסיוני פועל על ידי זיהוי הלחץ במערכת ושימוש señal הזה לשליטה בפתיחה ובסגירה של שסתום ראשי. בשסתום בטיחות ניסיוני, השסתום הניסיוני מפקח באופן רציף על הלחץ במעלה הזרם. כאשר הלחץ מגיע לנקודת ההגדרה, השסתום הניסיוני מגיב על ידי פירוק או إعادة כיוון של לחץ הבקרה, מה שמאפשר לדיסק השסתום הראשי להתרומם ולשחרר את הלחץ העודף מהמערכת. מנגנון דו-שלבי זה מעניק לעיצובים ניסיוניים יתרון משמעותי ברמת הרגישות והאיטמות בהשוואה לחלופות הפועלות ישירות.
מכיוון ששסתום הפעלה הוא אלמנט החישה והקבלת ההחלטות של המערכת, כל ירידה בביצועיו משפיעה ישירות על דיוקו ואמינותו של סט השסתומים כולו. שסתום הפעלה שהתגובה שלו איטית מדי, מוקדמת מדי או לא עקבית תגרום לשסתום הראשי להתנהג באופן לא יציב. מסיבה זו, האבחון חייב תמיד להתחיל עם הערכת שסתום הפעלה עצמו בצורה מקיפה, ולא להתמקד מיד בגוף השסתום הראשי.
הגאומטריה הפנימית של שסתום הפעלה מעוצבת לפי סעיפי סובלנות מדויקים. פתחים קטנים, مقاعد רכות ומנגנוני קפיצים רגישים – כולם תורמים לתגובתיותו. כל גורם המשנה את הסעיפים האלה — בין אם כתוצאה מזהמה, קורוזיה או עייפות מכנית — יבוא לידי ביטוי כקושי תפקודי הדורש טיפול דחוף.
תנאי הפעלה נפוצים המפעילים לחץ על שסתום הפעלה
שסתומים ניסיוניים תעשייתיים פועלים בתנאים קשים. הפרשי לחצים גבוהים, טמפרטורות גבוהות, תחומים קורוזיביים וזרמים המכילים חלקיקים כולם מפעילים מתח על הרכיבים הפנימיים של שסתום ניסיוני. לדוגמה, בשירות אדים, הצטברות קondenסט בתוך קו החישה הניסיוני עלולה לגרום לתגובה איטית או להפעלה שגויה. בשירות גז, חלקיקים יבשים יכולים לפגוע במושב הרך ולגרום לדליפה מעבר לנקודת ההגדרה.
מחזוריות תרמית היא מלחיצה משמעותית נוספת. כאשר שסתום ניסיוני מופעל שוב ושוב לשינויי טמפרטורה, התפשטות דיפרנציאלית של רכיבי המתכת יכולה לשנות את הרווחים הפנימיים ולהשפיע על המתח הראשוני של הקפיץ. עם הזמן, זה מוביל להיסט נקודת ההגדרה — אחד מהאתגרים הנפוצים ביותר בפעולת שסתומים ניסיוניים במפעלי תהליך רציפים.
הבנת הסביבת הפעולה הספציפית של שסתום הניסיון שלכם היא הצעד הראשון בכל תהליך אבחון תקלות. מצב היכשלות שתוכלו לצפות בו הוא לעיתים קרובות תוצאה ישירה של תנאי השירות שאליהם היה חשוף שסתום הניסיון, ותאמה של התסמין לסביבה מצמצמת במידה רבה את מסלול האבחון.
אבחון מצבי ההיכשלות השכיחים ביותר של שסתום ניסיון
שסתום ניסיון אינו נפתח בלחץ המוגדר
אחת הבעיות החשובות ביותר בתפקוד שסתום הניסיון היא אי-פתיחה שלו כאשר לחץ המערכת מגיע לנקודת ההגדרה המצוינת. מצב זה משאיר את הציוד המוגן חשוף ללחץ יתר, מה שמהווה סיכון רציני לביטחון. הסיבה השכיחה ביותר היא חסימה של פתח החישה או של פתח הכניסה לשסתום הניסיון. חומר חלקיקי, פסולת סקלה או נוזל תהליכתי שפולימריזציה שלו התרחשה עלולים לסגור באופן חלקי או מלא את המעברים הקטנים אשר דרך них שסתום הניסיון מודד את לחץ המערכת.
כדי לאבחן מצב זה, התחל על ידי בידוד שסתום הטייס ובדיקה של צינור האיתור למחסומים. נקה את צינור האיתור באמצעות ממס תואם או גז דחוס, בהתאם לנוזל בתהליך. אם צינור האיתור נקי, השלב הבא הוא ביצוע בדיקת שולחן (bench test) על שסתום הטייס על מדף בדיקה מאושר כדי לאמת את לחץ הפתיחה שלו לעומת ערך ההגדרה המצוין על הלוחית השם. שסתום טייס שלא נפתח בתוך התחום המותר של הסבירות חייב להיאמת מחדש או להוחלף.
עייפות הקפיץ היא סיבה נוספת לכישלון בפתיחה. קפיץ שאיבד את הלחיצה המקדימה המתוכננת שלו ידרוש לחץ גבוה יותר ממה שמצופה כדי להתכווץ, מה שמגביה אפקטיבית את ערך ההגדרה הפונקציונלי מעבר לערך החרוט על הגוף. בדוק את הקפיץ לסימנים של קורוזיה, התעבה קבועה (permanent set) או מגע בין ליפופי הקפיץ, אשר כולם מצביעים על צורך בהחלפה.
דליפת שסתום טייס מתחת ללחץ ההגדרה
דליפה דרך שסתום ניסיוני בלחצים הנמוכים מהערך המוגדר היא אתגר נפוץ ורבים פעמים מובן לא נכון. מצב זה, הנקרא לעיתים קרובות 'הבערה' או 'דמעות', מתרחש כאשר מושב השסתום הניסיוני פגוע, מזוהם או משומש. גם נזק מיקרוסקופי למשטח המושב יכול לאפשר לנוזל התהליך לעקוף את השסתום הניסיוני הסגור, מה שגורם לשסתום הראשי לפתוח חלקית ולדלוף לאטמוספירה.
פגיעת המושב בשסתום ניסיוני נגרמת לעיתים קרובות על ידי חלקיקים קשיחים בזרם התהליך שפוגעים בחומר המושב הרך בכל מחזור של הפעלה. עם הזמן, פגיעות אלו יוצרות חריצים או חורים שמניעים יצירת איטום 'ללא пузыרים'. בשירות קורוזיבי, התקפה כימית על חומר המושב יכולה להוביל לתוצאות דומות גם ללא פגיעה מכנית.
בעת אבחון דליפת מושב, יש לבצע בדיקת אטימות מושב על שסתום הפיילוט המבודד באמצעות חומר הבדיקה המתאים. אם מאומתת דליפה, יש לחפוף או להחליף את מכלול המושב והדיסק. חשוב לזהות ולטפל בשורש הבעיה - בין אם מדובר בזיהום, קורוזיה או בחירת חומר לא נכונה - לפני החזרת שסתום הפיילוט לשירות, אחרת אותה תקלה תחזור על עצמה תוך פרק זמן הפעלה קצר.
רעידת שסתום ניהול ומחזור מהיר שלו
רעידה מתייחסת לפתיחת וסגירה מהירה וחוזרת של שסתום ניהול ברצף. זהו אחד הקשיים הפונקציונליים המהותיים ביותר עבור שסתום ניהול מבחינת פגיעה מכנית, מאחר שכל מחזור הפעלה מעמיס את המושב, הדיסק והקפיץ בעומס מוחץ. רעידה ממושכת יכולה להרוס שסתום ניהול בתוך שעות ספורות ולגרום גם לפגיעות משמעותיות בשסתום הראשי.
הסיבה העיקרית לרעידה היא הפעלת שסתום הניהול בקרבת נקודת ההגדרה שלה. כאשר הלחץ המופעל במערכת הוא בתוך טווח של כ-10% מנקודת ההגדרה של שסתום הניהול, עלול להתרחש תנודתיות של השסתום בין מצב פתוח לסגור, במקום להגיע למצב יציב של פעולה. הפתרון הוא לרדת בלחץ המופעל, להגדיל את הפרש נקודת ההגדרה, או לבחור בשסתום ניהול עם טווח חירום רחב יותר המתאים ליישום.
שסתומי ניהול גדולים מדי יחסית לקapasיטט הלחיצה הנדרשת יכולים גם לגרום לרעידה. כאשר שסתום הניהול גדול מדי למערכת, הוא מוריד את הלחץ במהירות כזו שהלחץ בכניסה יורד מתחת ללחץ החזרה כמעט מיד, מה שגורם לשסתום להיסגר ואז לפתוח מחדש ברצף מהיר. קביעת הגודל הנכון של השסתום על סמך הקapasיטט הנדרשת להורדת לחץ היא חיונית למניעת תבנית כשל זו.
טיפול בהסטת נקודת ההגדרה ובעיות קליברציה
זיהוי הסטת נקודת ההגדרה בשירות
הסטת נקודת ההגדרה היא שינוי הדרגתי בלחץ שבו שסתום הניהול נפתח, ונתון לשינויים במשקולת הקפיץ, במצב הישיבה או בגאומטריה הפנימית לאורך זמן. זו בעיה מטעה במיוחד בתפקוד שסתום הניהול, משום שהיא מתפתחת לאט ואולי לא תזוהה עד לביצוע בדיקה שגרתית או עד שארע אירוע לחץ יתר שיגלה את הסטייה.
מחזור חום, כפי שצוין לעיל, הוא גורם עיקרי להסטת נקודת ההגדרה. החימום והקירור החוזרים גורמים לקפיץ להתרגל בהדרגה, מה שמפחית את משקולת הקפיץ ומוריד את נקודת ההגדרה האפקטיבית. בשירות בטמפרטורות גבוהות, תהליך זה עלול להתרחש בתוך עונה אחת של פעילות. בדיקת ספסל רגילה מול נקודת ההגדרה המצוינת על הלוחית השם היא הדרך המوثנית ביותר לגילוי הסטיה לפני שהופכת לאיום על הבטיחות.
תהליך הקורוזיה של השריג או רכיבי המבנה הפנימיים עלול גם לגרום להסטה בנקודת ההגדרה בכיוון אחד או שניים. תוצרים של קורוזיה שמתאגרים בין הליפופים יכולים לאלץ את השריג להיות קשיח יותר, מה שמגביה את נקודת ההגדרה, בעוד שאובדן חומר עקב קורוזיה מפחית את כוח השריג ומשפיל אותה. בחירת חומרי השריג המתאימים לסביבת התהליך היא החלטת עיצוב קריטית אשר משפיעה ישירות על יציבות האיזון הארוך-טווח של שסתום הנוהל.
איפוס מחדש של שסתום נוהל לאחר הסטת נקודת ההגדרה
האיפוס המחודש של שסתום נוהל חייב להתבצע תמיד על מדף בדיקה מאושר, תוך שימוש במصدر לחץ מאושר ובסוג הנוזל המתאים לבדיקה. מנגנון האיזון ברוב שסתומי הנוהל כולל בורג דחיסה של השריג או בורג איזון אשר משנה את הלחיצה המקדימה על השריג המרגיש. סיבוב בורג זה משנה את הלחץ שבו ייפתח שסתום הנוהל.
לפני ביצוע כל התאמה, יש לתעד את ערך ההגדרה הראשוני (as-found set point) כדי לרשום את גודל הסטייה לצורך תיעוד היסטורי של תחזוקה. נתונים אלו חשובים לחיזוי פרקי הזמן הבאים להתיישנות מחודשת, וכן לזיהוי האם הסטייה מואצת, מה שמעיד על בעיה יסודית חמורה יותר כגון נזק לקפיץ או קורוזיה מתפתחת.
לאחר התיישנות מחודשת, יש לבצע בדיקת פונקציונליות מלאה הכוללת אימות צמוד המושב ומדידת הלחץ הנמוך (blowdown). שסתום נווט אשר עובר את כל שלושת הבדיקות — לחץ פתיחה, צמוד המושב ולחץ נמוך — מוכן לחזור לשימוש. תמיד יש לסגור מחדש את מנגנון ההתאמה בח seals המראים התערבות (tamper-evident seals) לאחר התיישנות, כדי למנוע התאמות לא מורשות בשטח.
בקרת זיהום ותחזוקה מונעת לשסתומי נווט
איך זיהום חודר ומפגיע בשסתום הנווט
זיהום הוא הסיבה העיקרית והנפוצה ביותר לבעיות בתפקוד של שסתום פיקוד across כל התעשיות וסוגי השירות. המעברים הפנימיים הקטנים של שסתום פיקוד רגישים מאוד לסגירה על ידי חלקיקים, קשקשים, שעווה, משקעי פולימרים וכל זיהומים אחרים הקיימים בנוזלים בתהליך. גם נוזלים הנראים טהורים ברמה המקרוסקופית יכולים להכיל חלקיקים דקים שמתרכזים עם הזמן בחריצים הצרים של שסתום פיקוד.
בשירות נוזלי, אירועים של מכת מים יכולים לפרק קשקשים מצינורות המזינים את השסתום ולגרור אותם ישירות לקו החישה של שסתום הפיקוד. בשירות גז, ערבוב שמן שמשמש לסיכה במדחס יכול לכסות את המשטחים הפנימיים ולגרום לדיסק של שסתום הפיקוד להתחבר במצב סגור. בשירות אדים, אדים רטובים יכולים להכניס חומרים מומסים שמתגבשים בתוך שסתום הפיקוד כאשר האדים מתפוצצים ללחץ נמוך יותר.
התקנת מסננת או מסנן לפני חיבור הרגישה של שסתום הניהול היא אחת האמצעים המונעים היעילים ביותר הזמינים. גודל רשת המסננת צריך להיבחר על סמך התפלגות גודל החלקיקים של נוזל התהליך וקוטר הפתח המינימלי של שסתום הניהול. בדיקה וניקוי קבועים של המסננת הם חיוניים כדי להבטיח שהיא לא תהפוך בעצמה למקור של הגבלה בשטף.
יצירת לוח זמנים יעיל לתיקון ושימור שסתום הניהול
לוח זמנים מובנה היטב לתיקון ושימור הוא היסוד לביצוע אמין של שסתום הניהול. הפרק الزمنי המתאים לבדיקה תלוי בחומרת תנאי השירות, בחשיבות הציוד המוגן, ובנתוני הביצועים ההיסטוריים של התקנת שסתום הניהול הספציפית. בתנאי שירות קשים — טמפרטורה גבוהה, מדיה קורוזיבית או תדירות גבוהה של מחזורים — בדיקה שנתית ובחינה על שולחן העבודה מהווים את הסטנדרט המינימלי.
בכל אירוע תחזוקה מתוכנן, יש להוציא את שסתום הטייס משימוש, לפרק אותו ולבדוק אותו על נזקים, קורוזיה ותספיחים. יש להחליף את כל החלקים הרך, כולל טבעות O, דיסקיות מושב וגaskets, כחלק סטנדרטי של התהליך, ללא קשר למצב הנראה שלהם. עלות החלקים הלא קבועים הללו זניחה ביחס לעלות של כשל לא מתוכנן שנגרם על ידי חתימה פגומה שנראתה תקינה במהלך הבדיקה.
אחזקת שסתום טייס חלופי במצב קליברציה, מוכן להתקנה מיידית, היא פרקטיקה מומלצת הממזערת את עצירת התהליך במהלך אירועים של תחזוקה. כאשר שסתום הטייס המותקן מוסר לבדיקה, ניתן להתקין מיד את השסתום החלופי, מה שמאפשר לתהליך לחזור לפעול תוך כדי שמערכת השסתום שהוסרה תטופל בזמן נוח. גישה זו חשובה במיוחד במפעלים עם תהליכים רציפים, שבהם עצירות ממושכות יקרות מאוד.
שאלה נפוצה
מהם הסימנים הנפוצים ביותר שמצביעים על כך ששסתום הטייס זקוק לתשומת לב מיידית?
סימני האזהרה הנפוצים ביותר כוללים קול רתיחה משמיע או דליפת נוזל מהשסתום הראשי בלחץ הפעלה נורמלי, כשל של השסתום הראשי להיפתח במהלך אירוע לחץ יתר ידוע, רטט או מחזור מהיר של אסמבליית השסתום, וקורוזיה או נזק גלוי בגוף שסתום הפיקוד או בחיבורי קו החישה. כל אחד מסימנים אלו דורש חקירה מיידית ולא ניתן לדחותו לתקופת התיקון המתוכננת הבאה.
האם ניתן לתקן שסתום פיקוד בשטח, או שחייבים תמיד להעביר אותו לשולחן בדיקה?
ניקוי קל של חיבורי קו החישה החיצוניים יכול להתבצע לעיתים בשטח, אך כל תיקון שכולל פירוק פנימי של שסתום הפיקוד, החלפת חומרים רכים (soft goods) או התאמת נקודת ההגדרה חייב להתבצע על שולחן בדיקה מאושר. תיקונים בשטח ללא אימות עתידי על שולחן הבדיקה לא יכולים לאשר שהשסתום יפעל כראוי בנקודת ההגדרה שלו, מה שמבטל את המטרה של הפונקציה הבטיחותית שהוא מספק.
איך לחץ הפעלה משפיע על אמינות שסתום הניהול לאורך זמן?
הפעלת המערכת בלחץ שקרוב באופן קבוע לנקודת ההגדרה של שסתום הניהול מאיצה את ההתעכלות של המושב והדיסק, מגבירה את הסיכון לרעידה (chattering) ומקצרת את תוחלת החיים של הקפיץ. ככלל מדריך, יש לשמור על לחץ הפעלה נורמלי שקטן לפחות ב-10% מנקודת ההגדרה של שסתום הניהול כדי להבטיח שולי בטחון מתאימים. מערכות שמתקרבות באופן קבוע לנקודת ההגדרה צריכות לעבור ביקורת לצורך שיפור בקרת הלחץ או שינוי גודל שסתום הניהול.
מה יש לבדוק ראשית כאשר שסתום הניהול אינו מתייצב מחדש לאחר פתיחה?
כאשר שסתום ניסיון אינו מתייצב מחדש, הבדיקות הראשונות צריכות להתמקד בכך שהאם לחץ המערכת אכן ירד מתחת ללחץ ההתישבות המחודשת, האם יש פגיעה או זיהום במשטח התחברות של שסתום הניסיון המונע סגירה צמודה, והאם הגדרת ההפרשה (blowdown) מתואמת כראוי ליישום. שסתום ניסיון שנותר פתוח לאחר שיורד הלחץ לרמה של התישבות מחודשת, כולל בדרך כלל בעיה במשטח התחברות או בדיסק, ודורש בדיקה על שולחן העבודה, וכנראה החלפת משטח התחברות או הסחתו (lapping).